The official Jelly Bean JZO54K for Galaxy S2 has been leaked and is now available for download. Earlier same build was leaked for SGS3. Now you can flash Jelly Bean JZO54K on Galaxy S2, build is JZO54K. It’s first ever Jelly Bean update leak available at the moment and is reported to be “near perfect” & “really stable”. This is the official pre-release firmware that is being tested and could be released next month. For those who don’t want to wait, you can now flash I9100XXLSJ on Galaxy SII I9100 with Odin. First, have a look at some new features:
Some of the Enhancements in the new Jelly Bean Update:
- Buttery Smooth Performance & Great Stability (Thanks to Project Butter)
- New TouchWiz Nature UX (Same UI as of the Galaxy S III and Galaxy Note II)
- Samsung’s Cloud services
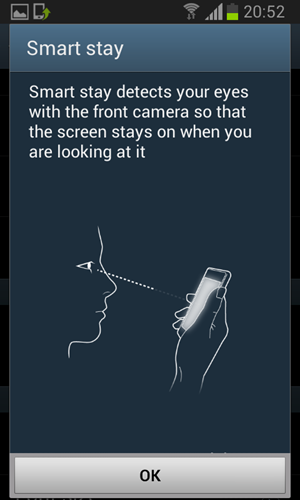
- Direct Call, Smart Stay and Pop-up Play Features
- New Widgets From the Galaxy S III
- 2 Home screen modes
- New Notifications bar
- Google Now
Firmware Details:
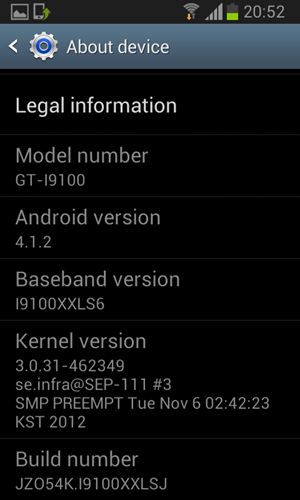
- Android Version: 4.1.2 – JZO54K (Jelly Bean)
- PDA: I9100XXLSJ
- CSC: I9100OXXLS1
- MODEM: I9100XXLS6
- Changelist: 462349
- Build Date: 6th November 2012


How to Flash I9100XXLSJ on Galaxy S2 (Android JZO54K)
Step 1: Download the flashable zip package to your PC: I9100XXLSJ_I9100OXXLS1_OXX.zip
Step 2: Extract the downloaded zip file.
Step 3: Launch Odin 3.04 which is included in the download package.
Step 4: Now put your Galaxy 2 I9100 in download mode. To do this:
- Switch your phone off
- Press & hold Power + Home + Volume down buttons till you see a triangle and Android robot.
- Now press the Power button to confirm entering the download mode.
Step 5: Once your device is in download mode, connect it to the computer. (Odin should already be running, as per step 3)
You will now notice that one of the ID:COM boxes in Odin will turn yellow when you connect the phone. It may take some time, so be patient and do not proceed to next step till you see it (the box getting yellow).
Step 6: In Odin do the following:
- Click on “PDA” then browse and select I9100XXLSJ_ I9100OXXLS1_I9100XXLS6_HOME.tar file.
- Click on “PHONE” and select the MODEM file. There will be a file with “Modem” in it’s name.
- Click on “CSC” and select the CSC file. There will be a file with “CSC” in it’s name.
- Click on “PIT” and select the PIT file.
These files should be where you extracted the zip file in step 2 above. If any of these files are missing, just skip it and proceed with the process.
Step 7: After selecting the files, click on “Start” button. Before you click it: In Odin options, you need to make sure that “re-partition” option is NOT selected while “Auto Reboot” and “F . Reset Time” options are selected.
Odin will now begin the process to flash Jelly Bean JZO54K Jelly Bean on Galaxy S2. It may take some time so be patient with it. Once it completes, your device will reboot. You can now disconnect it from the PC and start using it.
You can confirm from Settings > About that the firmware has been installed. Enjoy!
via XDA
